So you’ve just decided to delve into the world of CRM… Congratulations! CRM is a helpful tool for building up those valuable relationships, whether it’s for work, your own small business, or personal use. But we’re sure you already knew that!
To help you get started in your CRM journey, we’ve put together a quick step-by-step guide to setting up your new CRM. Once you complete all these steps, you can get to work developing relationships with your contacts!
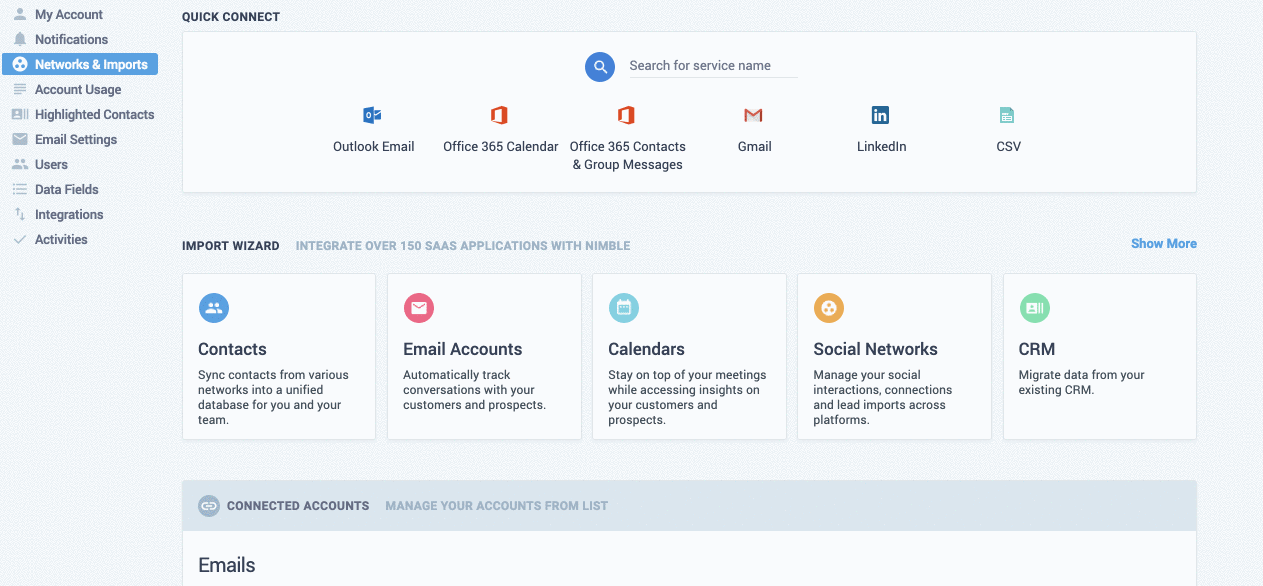
- Connect your email & calendar
- Import your contacts
- Get your CRM’s add-ins
- Add your team members
1. Connect your email & calendar
To make sure you’re making the most of your new CRM, the first step is to connect your email. Since the point of a CRM system is to help you keep track of your communication with others, it makes the most sense for your CRM to work in the places where that happens the most (i.e. your email).
Additionally, you’ll likely be sending emails from your CRM. So having your email connected will ensure that your emails appear to be coming from you, and not some anonymous marketing email service. At least that’s how it works in Nimble.
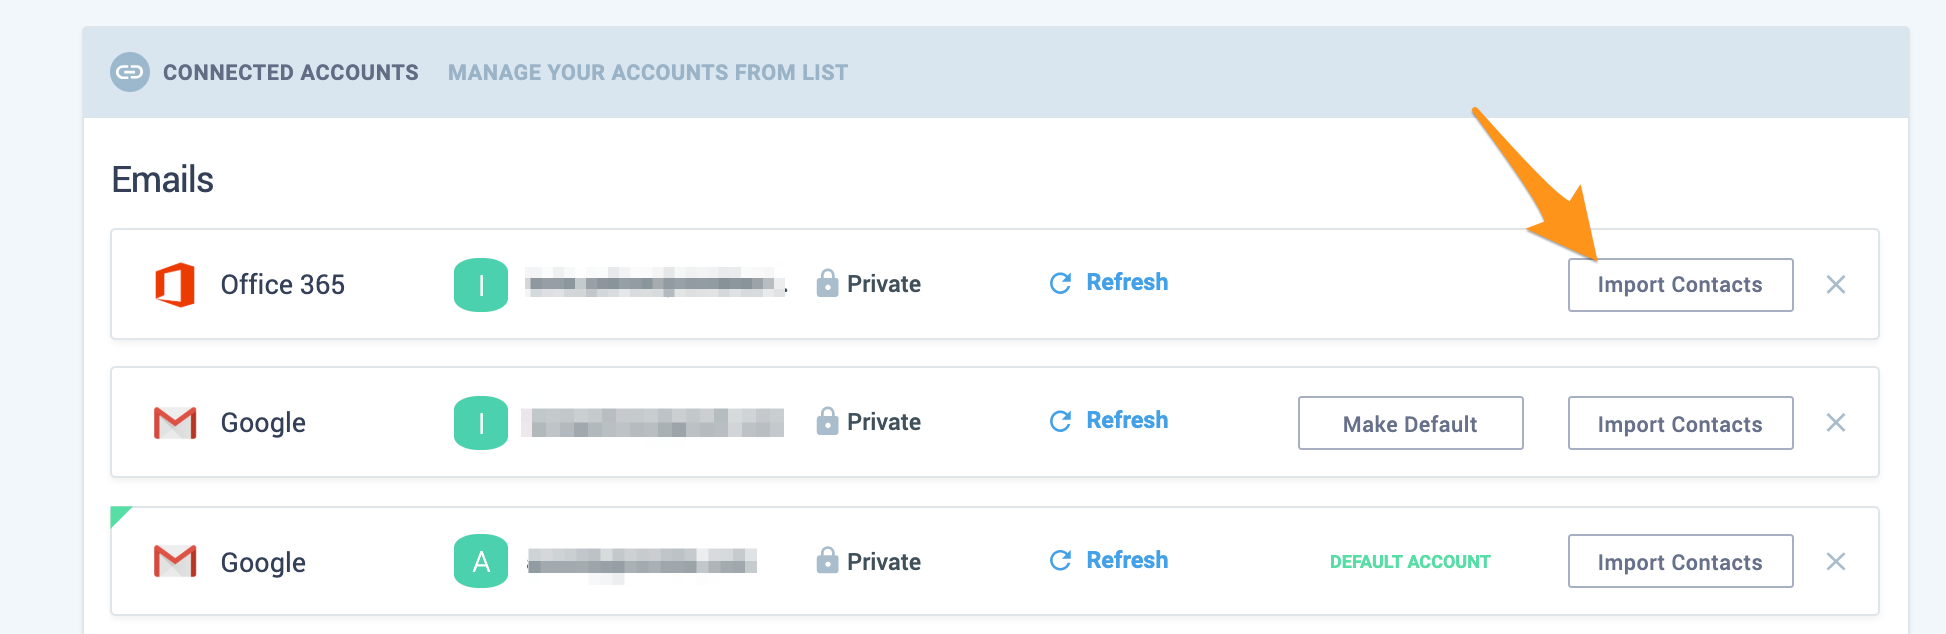
In Nimble, users can connect as many emails as they need! This is useful because you can either continue to send emails from your preferred email client or through Nimble. Either way, your communication will sync automatically and be available for view in your contact records in Nimble!
Social Media
Similar to the previous point, your CRM needs to work with you wherever you connect with people. Nowadays, plenty of us interact with others mainly through social media. So, if your CRM is capable, you need to connect your social media accounts with your CRM.
Nimble directly integrates with Twitter and can automatically track Twitter DMs you exchange with your contacts. The Nimble Prospector browser extension also makes it possible to create and access contact records from anywhere on the web, including all your favorite social media platforms!
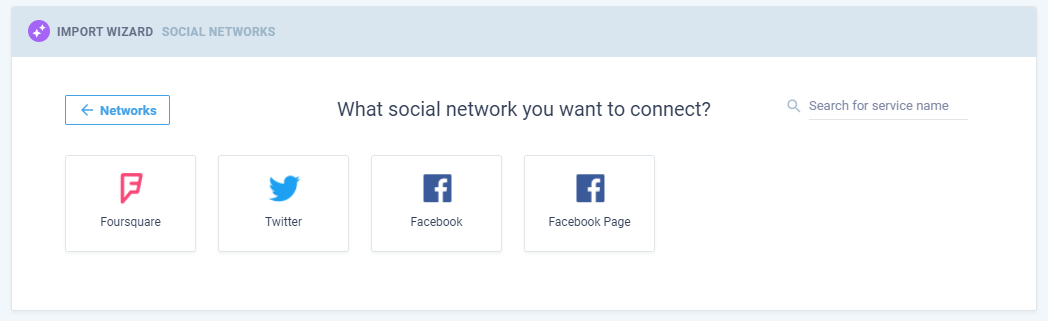
In Nimble, connecting your social media is just as easy as connecting your email! You even have the option to import your friends, followers, and people you follow as contacts. But we’ll get to that in the next section.
2. Import your contacts
Here’s where things start to get fun! Remember, “CRM” stands for Contact Relationship Management. That means that the heart of your CRM lies in your contacts! Importing your contacts could very well be the most important step in setting up your CRM.
Before we jump into importing contacts, please remember to only import necessary contacts. When deciding which contacts to import, take your time evaluating which contacts you absolutely need. The last thing you want is for your database to become cluttered!
This article from Harvard Business Review on why CRM projects often fail suggests that aiming for higher volumes of data can lead to lower quality contact entries that provide little to no value for your team.
Additionally, importing too much data all at once can lead to wasted time spent on cleaning your database.
If this is your first time setting up a CRM system, your contacts will likely be coming in from various sources. There are a few different ways for you to import contacts into your CRM database. Some examples include:
- Spreadsheets
- Email contacts
- Social media contacts
- Mobile phonebook
Nimble makes importing contacts easy! First off, you can import contacts from .CSV files with Nimble’s Import Wizard. Next, you can import contacts from your email with the click of a button! And remember how I said that Nimble can import your social contacts? Nimble integrates directly with Twitter, so bringing in your Twitter contacts is a breeze!
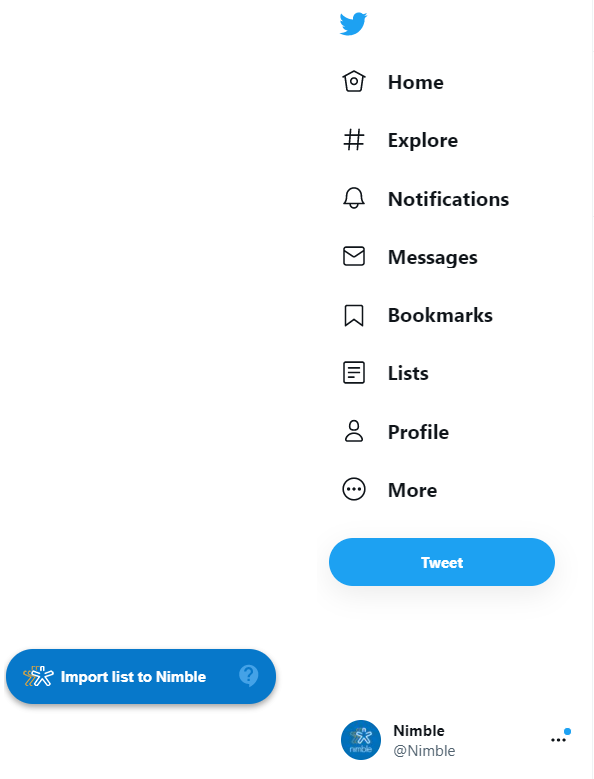
Import Twitter Contacts to Nimble
Just navigate to Settings >> Networks & Imports and then click the “Import Contacts” button. You can also do this right after connecting your social media accounts since this page will already be open.
Again, please be mindful of how many contacts you import. Rather than importing as much data as you can, aim to only import as much as you need.

Once you’ve clicked the “Import Contacts” button, you can choose which contacts to import. Nimble gives you the option to import Friends, Following, Followers, and Twitter Lists.

You can import Twitter Lists directly from Twitter with Nimble Prospector.
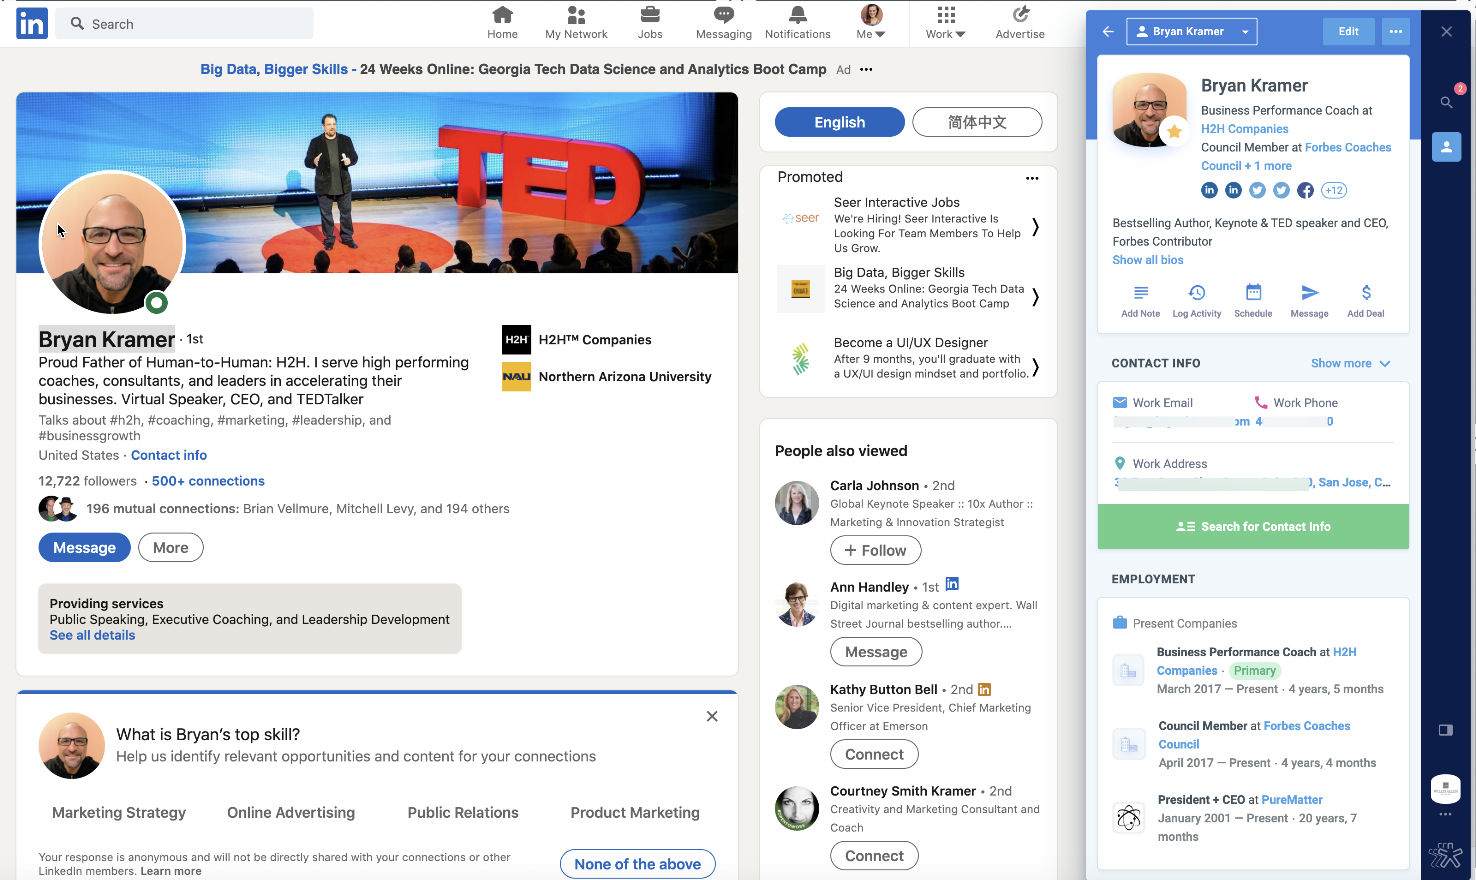
Nimble Prospector also gives users the option to import contacts one by one from any social networking site. Simply open the browser extension and hover over any hyperlinked name, et voila! Nimble will automatically generate a contact record or bring up their existing one.
We highly recommend importing contacts one by one. This helps to minimize the amount of clutter in your contact database.
Tagging Contacts
To help keep your database organized long term, remember to tag contacts as you import them! We recommend establishing a standard format to tag new imports. Here’s an example:
Source – Importer Name – MM/YYYY
For example, “Outlook Contacts – Vivian – 07/2021”
Alternatively, you can tag imports with multiple tags such as:
“Twitter – Vivian”, “07/11/2021 – Vivian”
You can customize your tagging methods to fit your needs. Whatever you end up doing, try your best to stick to your format. Having a standard format like this will help keep your database tidy in the long run.
You can refer to this Nimble support article for more information on tags and what they can be used for.
3. Get Your CRM’s Add-Ins
The next step is to help make sure that you’re using your CRM to its full potential. Many CRM services include add-ins, plugins, and extensions. Nimble, for example, has add-ins for Outlook, Gmail, and Microsoft Teams, as well as a browser extension called Nimble Prospector.
If you spend a lot of time working on your phone, be sure to check if your CRM has a mobile app as well!
4. Add Your Team Members
If you’re using your CRM with a team, remember to add them to your account. This is necessary for collaboration and to make sure everyone is on the same page. It’s extremely useful to be able to view your team’s contacts, messages, activities, and pipelines.
Please note that typically only admins or account owners can do this.
Permissions
When adding team members to your account, make sure to keep track of their permissions. In Nimble, you can sort your team members into groups which provide them with access to certain sets of features.
Features you can set permissions for include:
- Bulk export
- Bulk delete
- Access API
- Configure pipelines
…and more! Not all features will apply to every team, so take the time to evaluate which features & permissions your teammates will need access to.
Other Tips & Tricks!
Once you complete the five steps above, you should be able to get right to work! Here are some tips to keep in mind to make sure you reap the benefits of your new CRM:
1. Keep it organized
This is the most important tip by far! Keeping your CRM tidy will make it much easier for you to get work done. As mentioned earlier, make sure you only import as many contacts as you need.
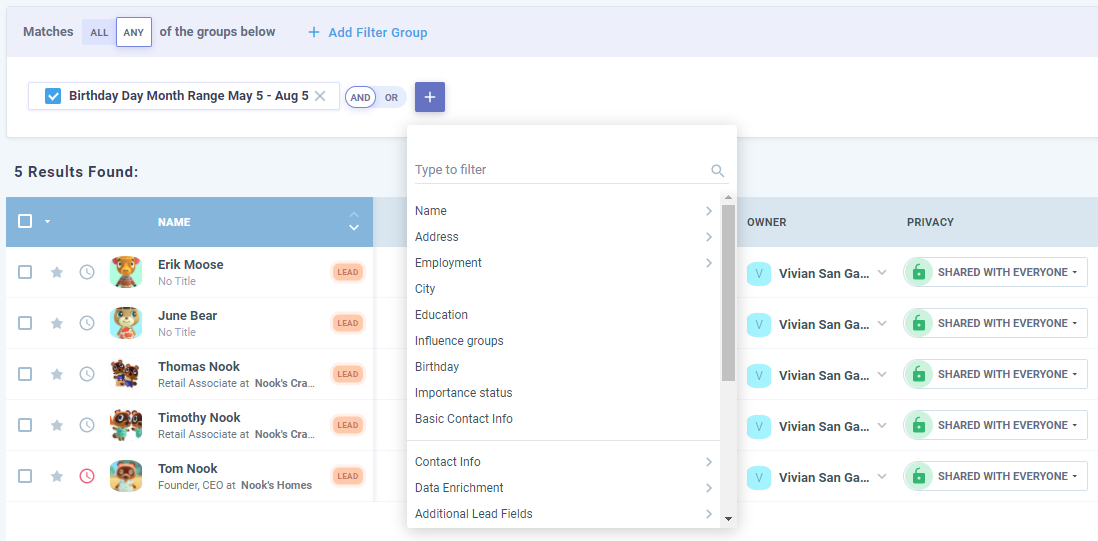
Other ways to keep your database clean include tagging your contacts appropriately and creating saved segments. Segments can consist of combinations of tags and other data fields.
For example, if you’re setting up a saved segment search in Nimble, you can look for people who have birthdays in September and have Twitter accounts. This is useful for sending targeted, personalized outreach. In Nimble, you can even add custom data fields to customize your segment search and organize your contacts!
Also, if your CRM is capable, declutter your contacts by merging duplicates.
Fun fact: Nimble automatically merges contacts with the same email address!
2. Remember to update information
Keep your contact records up to date! Regularly take time to ensure that your contacts’ information is current. That includes their email addresses, phone numbers, company/title, and social media. Depending on your needs, this can include other fields as well.
3. Get to know your CRM’s features
Every CRM is different, so spend some time acquainting yourself with your CRM system. In Nimble, for example, there are plenty of useful features aside from contact management. Nimble features deals & leads pipelines, stay-in-touch reminders, the Nimble Prospector browser extension, and way more!
You’ll also want to spend some time customizing your CRM and its features to meet your specific needs.
4. Take advantage of support
Learning how to use and maintain your CRM is a worthwhile investment. But it can also sometimes be difficult to do alone. Stay in touch with your CRM provider and don’t be afraid to ask for help. Nimble not only has a world-class support team but also weekly webinars to help users navigate their CRMs better!
You don’t have to figure everything out on your own! Don’t hesitate to ask questions.
Resources
Speaking of taking advantage of support, here are some resources to help you get started with your new CRM:
- The Ultimate Beginners Guide to CRM [.PDF]
- Getting Started in Nimble – Support article
- How to Get Started in Nimble CRM – YouTube playlist
Conclusion
We hope this guide was helpful! If you would like extra help, please feel free to browse our support articles at https://support.nimble.com/en/. As mentioned above, we also have weekly webinars where we go over the basics of Nimble CRM including setup, deals & reporting, contact cleanup, segmentation, and more! We invite you to join us to learn more about CRM and how Nimble can help you grow your business.
How to Get Started
If you do not have a Nimble account yet, we invite you to try it for free for 14 days.
Stay tuned for more product announcements as we evolve Nimble into the best CRM for Microsoft 365 and Google Workspace teams.